Last updated November 17, 2026

Free written scope consultation - allowances, timeline, and change-order rules on paper before a single trade is scheduled
Driveway & Pavers Troubleshooting in Lewisville: Common Problems and How to Fix Them
If your driveway crack runs parallel to the street, you have a different problem than if it runs perpendicular, and patching them the same way is exactly why so many Lewisville driveway repairs fail within two seasons. A crack’s direction, width, and where it starts and stops tell you whether you’re looking at clay heave, tree roots, thermal movement, or something happening three feet below the surface. Most homeowners assume any crack means the same fix. It doesn’t. This guide walks you through the four failure modes we see across Lewisville, how to read the symptom pattern before you call anyone, and where the honest line sits between repair and replacement.
Quick Answer
Most driveway problems in Lewisville trace back to one of four causes: expansive clay soil movement, tree root intrusion, thermal expansion and contraction, or pavers installed without proper edge restraints. Read the crack pattern and joint gaps first to identify which one you have, because patching a clay heave crack like a thermal crack is why repairs fail. A repair is worth doing when the slab base is still stable and cracks are under 1/4 inch; replacement becomes the honest answer when you see 1/2 inch or wider separation, more than 1/4 inch vertical displacement between panels, or ongoing movement after two full seasons.
Styles & brands we work with
- Kitchen remodeling
- Bathroom remodeling
- Home additions & ADU
- Roofing
- Windows & doors
- Driveway & pavers
- Fence
Table of Contents
- How to Read Crack Geometry: Clay Heave vs. Tree Roots vs. Thermal Expansion
- Why Pavers Fail Along Lewisville’s Sandy Loam Transition Zones
- When Polymeric Sand Re-Topping Works and When It Doesn’t
- Sunken Panel Diagnosis: Active Settlement vs. Stabilized
- Paver Joint Problems: Sand Loss, Weeds, and Ant Mounds
- Drainage and Ponding: Why Water Is Almost Always the Root Cause
- Repair or Replace? The Measurements That Define the Tipping Point
- Choosing the Right Materials for a Lewisville Repair
How to Read Crack Geometry: Clay Heave vs. Tree Roots vs. Thermal Expansion
Crack geometry is your first diagnostic tool, and it costs nothing to check. Before you call anyone, walk your driveway with a tape measure and a notebook. Note the direction of each crack, where it starts and stops, whether the two sides have shifted vertically, and how wide the gap is. That pattern tells a trained eye which failure mode you’re dealing with in under five minutes.
Concrete in Lewisville sits on soil that expands when it absorbs water and shrinks as it dries. That movement is normal, and concrete is designed to accommodate some of it through control joints. When the movement exceeds what the joints can handle, the slab cracks on its own terms.
- Parallel cracks (running with the street) usually signal clay heave or settlement under the slab. The soil is pushing up or dropping down and the slab is bending along its long axis. Look for a parallel crack about 2 to 4 feet in from the edge.
- Perpendicular cracks (running from the street toward the house) most often come from thermal expansion during a hot Texas summer. The slab pushes against itself and cracks at the weakest point. These are usually narrower and more evenly spaced.
- Diagonal cracks radiating from a corner point to a concentrated load or a root system pressing up from below. Walk the line of the crack outward and look for a tree trunk. In established Lewisville neighborhoods like Old Town and Valley Ridge, a mature live oak or pecan can push roots 20 to 30 feet from the trunk.
- Stair-step cracks along the control joints indicate one panel is settling while its neighbor holds firm. That’s a base problem, not a surface problem.
Vertical displacement is the number to write down. If one side of a crack sits higher than the other by more than 1/4 inch, the slab is no longer moving as a unit. That’s the case where grinding or patching alone won’t fix the problem because the problem is underneath, not on top.
White powdery lines along cracks
Efflorescence (the white mineral bloom you sometimes see along a crack) is not itself a structural warning. It’s moisture moving through the concrete and leaving mineral deposits as it evaporates. It does tell you water is finding a path, which is worth tracking even if the crack is small.
Why Pavers Fail Along Lewisville’s Sandy Loam Transition Zones
Paver failure in the northeast quadrant of Lewisville looks different from paver failure anywhere else in the city, and it comes down to what’s under the sand. Sandy loam transitions to heavier clay in that area of town, and the soil can change composition within a single driveway’s footprint. A driveway installed with edge restraints sized for stable soil can lose a paver or two per season on the sandy side of the property line and stay perfect on the clay side. Fifteen feet away.
Edge restraint is the invisible part of a paver installation that keeps the whole system locked together. The pavers themselves are held in place by the joint sand plus the compression from their neighbors, but the perimeter needs a rigid border. On sandy loam, that border has to be deeper and more thoroughly anchored than the same installation would need on pure clay.
The failure signature to look for
When a paver driveway starts walking outward at the edges, the surface pattern warps. Joints that were once uniform 2mm gaps open to 6, 8, or 10mm wide at the perimeter while the center stays tight. Pavers begin to lean. You might find one row creeping 1/2 inch past the concrete curb, then the next row following. Water gets into those opened joints, the sandy loam beneath the edge washes out, and the whole edge fails faster.
If you see edge pavers leaning outward or a joint line running wavy at the driveway’s border, the installation needs edge restraint work before re-sanding. Re-sanding alone will fail because the underlying problem is movement, not sand loss.
How edge restraint should be built
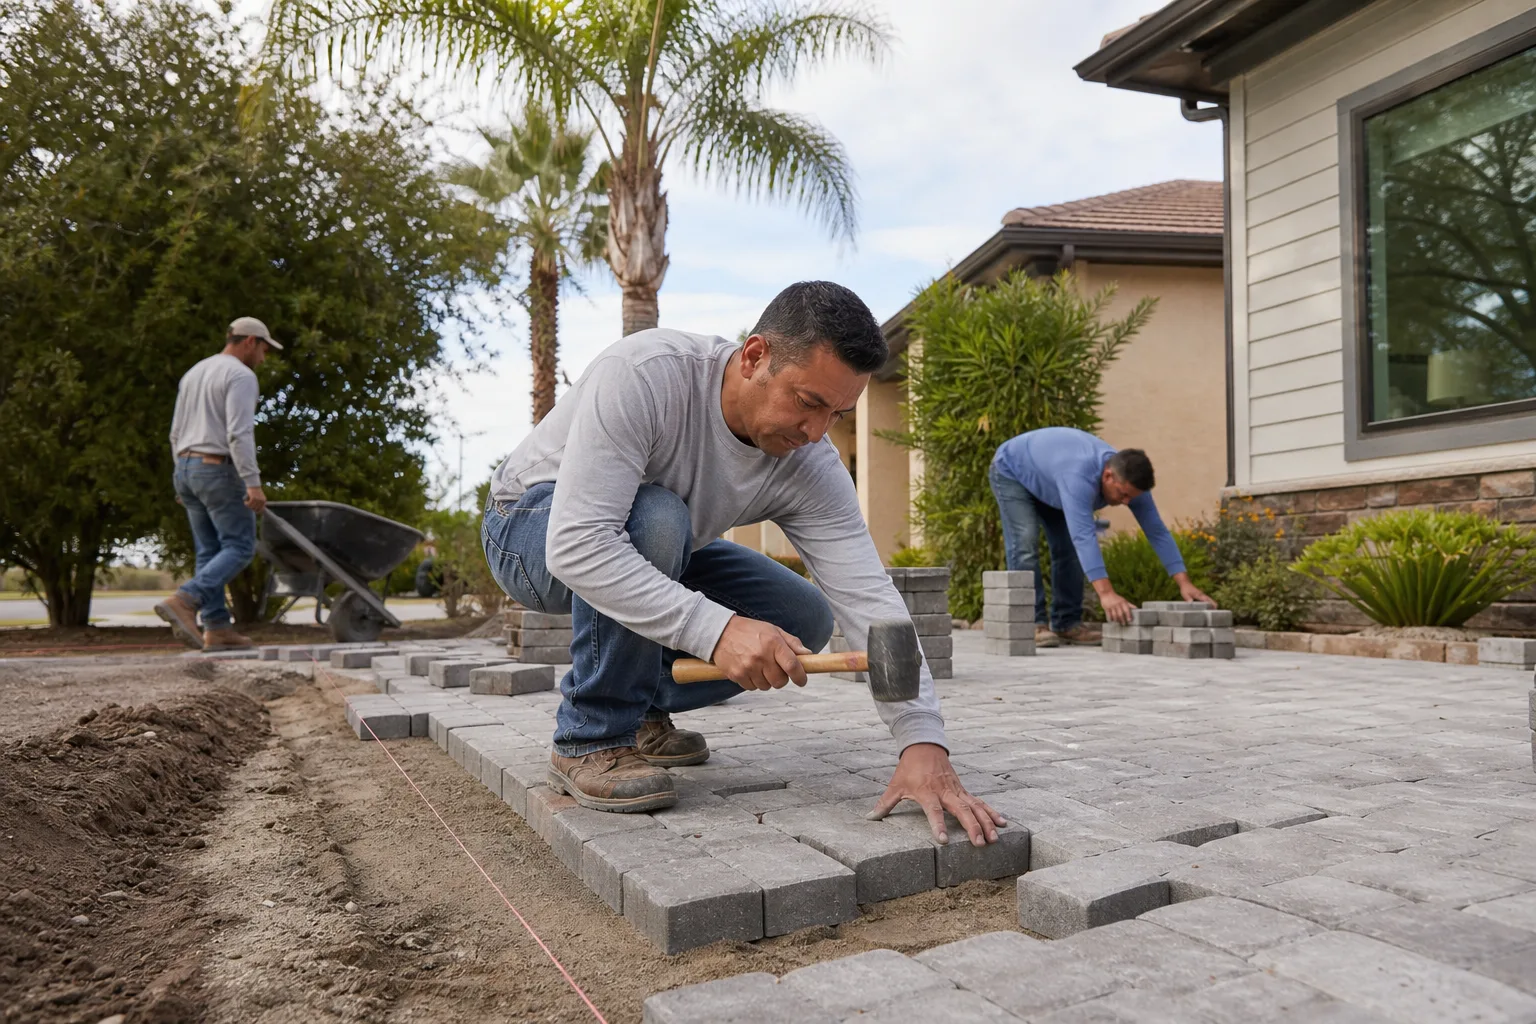
- Excavate a trench along the perimeter that reaches stable soil, not just the bedding layer.
- Set the restraint in concrete or spike it deeply into the base, depending on the product and soil type.
- Verify the restraint is at the correct height so the paver sits flush with the top edge.
- Backfill and compact the soil behind the restraint so it doesn’t wash out.
- Re-sand the joints after the restraint is set, and vibrate the surface to lock the sand in place.
If you’re planning new work or rebuilding an edge, our driveway & pavers work covers the material selection and installation side, and we work with Belgard, Unilock, Techo-Bloc, Tremron, and Cambridge Pavers so you have real options for restraint-compatible borders.
When Polymeric Sand Re-Topping Works and When It Doesn’t
Polymeric sand re-topping is the most over-recommended driveway fix we see in Lewisville. It works beautifully on new installations and on joints that stay within spec. It fails on driveways where the joint gaps have opened wider than the product can bridge. Most polymeric sands are rated for joints up to a certain width, and once you exceed it, the sand cures in a brittle sheet that cracks away from the pavers within a season.
The threshold matters. Joint gaps of 2mm or less are ideal. Joints between 2mm and 8mm can still be handled by wide-joint-rated products. Joints wider than 8mm are usually a sign that the pavers themselves have shifted or the installation pattern has spread, and no sand product will hold in that condition.
Products rated for wide-joint repair
Not all polymeric sands are built the same, and the product name on the bag matters. Alliance Gator makes a wide-joint formula intended for exactly this scenario. Techniseal offers a similar wide-joint grade. Both are formulated to fill larger gaps without cracking as they cure, and both are used widely in North Texas because our temperature swings are hard on standard joint sand.
Specialty wide-joint products also work, and we stock several when a repair calls for it. The critical rule is that no product should be used outside its rated joint width. If you’re looking at an 8mm joint and the bag says 4mm maximum, walk away and diagnose the underlying movement first.
What happens when re-topping is done wrong
- The new sand cures as a brittle layer that separates from the pavers, and you sweep it out within a year.
- Water sits on the surface because the failing sand has nowhere to drain, making the driveway slick.
- The original joint failure continues below the new sand, so the pavers keep shifting.
- Weeds find the cracks in the failing polymeric material and spread faster than before.
The honest test is to look at joint width before you commit to a re-sand. Narrow joints with intact sand: re-sand and move on. Wide joints with intact pavers: wide-joint product. Wide joints with leaning or displaced pavers: stop and diagnose the edge restraint.
Sunken Panel Diagnosis: Active Settlement vs. Stabilized
A sunken concrete panel can be either an ongoing problem or a settled one, and the two call for completely different responses. Sealing an active settlement is money thrown away because the slab will keep dropping. The only way to know which you have is to measure over time.
Here’s the field test. Place a straightedge (a level, a long board, or a piece of string pulled tight) across the sunken panel and the two adjacent panels. Note the gap at its lowest point. If the drop is 1/4 inch or less, it might be cosmetic. If it’s more than 1/2 inch, the panel has moved enough that the driveway is unlikely to drain correctly and standing water will accelerate the problem.
Then mark your measurement with a piece of tape on a stake next to the driveway, or photograph the straightedge in place with a date stamp. Wait one full wet-to-dry cycle in Lewisville. Our summers are dry and our late spring rains are heavy. That cycle is what drives the swell-shrink movement in expansive soils. If the gap changes by more than 1/8 inch across that cycle, the settlement is active. If it stays the same, the slab has stabilized.
What active settlement means
An active sunken panel usually indicates water is undermining the base. That’s often a drainage problem, a broken irrigation line, a downspout that discharges too close to the slab, or a tree root that’s causing a gap the soil has fallen into. Repairing the surface without fixing the water source just kicks the problem down the road. Mudjacking or polyurethane foam injection can lift a settled panel, but only after the cause is identified.
What stabilized settlement means
A stabilized panel has stopped moving. In that case, a surface repair like a grind-and-overlay or a full panel replacement actually solves the problem. If the panel is more than 1/2 inch out of plane and adjacent panels are still solid, grinding down the high side or replacing the sunken panel is worth considering.
If you aren’t sure, wait a season. It’s cheaper to wait than to pour money into a repair that fails again in 18 months.
Paver Joint Problems: Sand Loss, Weeds, and Ant Mounds
Joint sand loss is normal, but the rate of loss tells you whether the installation is healthy or failing. A paver driveway in Lewisville loses some sand every year from rain, wind, and traffic. That’s expected. What is not expected is losing an inch of sand depth in a single season, and it’s a diagnostic red flag rather than a maintenance annoyance.
When joints lose depth quickly, water is funneling through the paver system too fast. That’s usually a sign the underlying bedding sand is compromised or that the pavers are moving enough to open joints each time a vehicle rolls over them. Re-sanding without addressing the movement is a treadmill.
Weeks versus weak installation
Weed growth in paver joints is one of the most common complaints, but weeds are a symptom. They sprout wherever the joint sand is thin enough to let light through. If you’ve got dandelions and crabgrass coming up in driveway joints, the sand layer is depleted. Pull them, re-sand with a proper polymeric product, and the weed pressure drops dramatically the next season. If the weeds come back immediately, that’s again a sign the sand isn’t holding.
Ant mounds under pavers
Ant activity under a paver driveway is not unusual in North Texas, and it’s not a structural failure. Fire ants and native ants nest in the sand bedding layer and move it around. The fix is to treat the ant problem directly and then re-sand once the colony is gone, not to rip up the driveway. If you’ve tried everything and the ants keep returning, a perimeter treatment combined with joint re-sanding usually solves it.
Drainage and Ponding: Why Water Is Almost Always the Root Cause
Almost every driveway failure we diagnose in Lewisville comes back to water. Water under the slab causes settlement, water in the joints causes paver movement, water pooling at the bottom of the driveway causes edge erosion. Before you spend money on a surface fix, find out where the water is coming from.
A properly graded driveway should shed water toward the street or a drainage point without standing anywhere. If you see a puddle that lasts more than 24 hours after rain, the grading is off, the slab has settled, or the drainage path has been blocked. Walk the perimeter after a heavy rain and trace where the water goes.
Common drainage failure points
- Downspout discharge too close to the driveway. A downspout that empties onto pavement sends water into the joint between the concrete and the house footing. Extending the discharge 4 to 6 feet past the driveway edge is a cheap fix with a real impact.
- Missing or failed edge restraint. Pavers without edge containment let water get under the bedding layer and wash out the base.
- Improper slope. A driveway is not flat, even if it looks flat. There should be a gentle pitch from the house to the street. If it’s not there, water pools.
- Tree roots pressing up from below. Roots can lift a panel enough that it becomes a dam, holding water that would otherwise drain.
- Gutter overflow. Any point where roof water dumps directly onto the driveway in one spot is going to fail eventually.
Where drainage problems show first
Drainage failures almost always start at the lowest elevation in the driveway, which is usually where it meets the street. Cracks and pavers shift there first. If your repair history keeps coming back to the same bottom-of-driveway panel, the problem is at the elevation, not the concrete.
Repair or Replace? The Measurements That Define the Tipping Point
The question every homeowner eventually faces is whether the repair is worth doing. We walk homeowners through this with specific numbers because opinions vary and measurements are objective. If your driveway meets replacement criteria, we’ll tell you. If it doesn’t, we’ll fix what’s there.
Repair is usually the right call when:
- Cracks are 1/4 inch wide or narrower and the two sides of each crack are still level within 1/8 inch.
- No more than one or two panels show significant displacement.
- The failure is a joint problem, not a base problem (paver sand loss without movement is one example).
- The slab is still tight against the house and the drainage path still works.
- You’re within the first three to five years after installation.
Replacement becomes the honest answer when:
- Cracks are 1/2 inch wide or wider, or vertical displacement between panels exceeds 1/4 inch.
- More than 30% of the driveway’s surface shows cracking, displacement, or crumbling.
- Settlement is still active after two seasons of measurement, meaning mudjacking or foam injection won’t hold.
- Pavers have shifted, spread, or lost edge restraint in more than 25% of the perimeter.
- The base layer has failed or the driveway is holding water it can’t shed, and the fix requires a full tear-out and rebuild.
The 30% surface rule and the 1/4 inch vertical displacement number are two of the most useful benchmarks to keep in mind. Below those, repair is usually economically rational. Above them, you’re paying for repairs you’ll have to redo, and the honest money goes toward a rebuild.
What a rebuild covers that a repair doesn’t
A rebuild replaces the base, re-establishes the drainage slope, and resets the edge restraint. That’s why it lasts. A repair puts a good surface on a foundation that hasn’t been addressed, and the clock starts ticking again on the same failure mode. It’s worth asking your contractor what the repair actually resolves and what it leaves in place.
For broader scope questions, the Construction Lewisville main page covers the full range of exterior-to-interior work we handle, since we often end up rebuilding a driveway as part of a project that also touches fencing, siding, and drainage.
Choosing the Right Materials for a Lewisville Repair
Material choices for a Lewisville repair depend on the failure mode, and getting the product wrong is why the failure comes back. Selection quality matters less than selection fit. Here are the product categories that come up most:
Concrete patching and overlays
For crack repair on stable concrete, a polymer-modified patching compound is the standard. For wider cracks, an epoxy-injected crack fill is more durable because it bonds to the concrete on both sides. The wrong choice is a cementitious patch on a crack that’s still moving, which is exactly the failure we see when someone patches a clay heave crack as if it were thermal.
Paver selection for future repairs
If you’re choosing pavers for new work or planning a partial rebuild, partnering with a manufacturer that maintains matching products for a long time is smart. Brands like Techo-Bloc, Belgard, Cambridge Pavers, Unilock, and Tremron all keep their core product lines in production for the long haul, so a repair in five years can actually match the original installation. Single-brand installers can’t always offer this because they only carry one manufacturer’s line. Working across several manufacturer relationships means you can match the paver color, texture, and thickness without compromise.
Joint sand products
Alliance Gator and Techniseal are two of the most trusted names for polymeric joint sand in North Texas. Both make wide-joint formulas for joint gaps above the standard 2mm maximum. There’s also quikrete and sakrete joint sand for lower-cost applications, but those are best reserved for installations that don’t get vehicle traffic.
When you’re tying a driveway in with a bigger project
Lewisville homes often have boundary line issues between the driveway, the fence, and any outbuildings, and coordination matters. Our fence installation work handles the perimeter, and our home additions & ADU projects often require re-grading that touches the driveway edge. Handling those pieces under one contractor avoids the situation where one trade blames another and nobody fixes the actual problem.
Common Mistakes to Avoid
- Patching every crack the same way. A thermal crack and a clay heave crack need different repairs, and using the wrong one guarantees a failure within two seasons.
- Re-sanding pavers with wide joints using standard polymeric sand. Joints wider than the product’s rated maximum will fail, and the failure looks worse than what you started with.
- Re-sanding before you’ve checked edge restraint. If pavers are moving, re-sanding is cosmetic. Fix the restraint first, then re-sand.
- Sealing an active settlement. Sealant traps moisture and hides the movement. Diagnose whether the settlement is active before you put anything down.
- Ignoring drainage. Every surface repair that skips the drainage question is a bet against the water table, and Lewisville’s rainy season wins that bet.
- Assuming a wide crack needs replacement. A single 1/4 inch crack in an otherwise healthy slab is a repair, not a rebuild.
- Buying pavers from a single brand without checking future availability. Matching a repair five years from now requires the manufacturer to still be making that product line.
See the difference
 Before
 After
 Before
 After
 Before
 After
When to Call a Professional
Call a professional when you’ve identified the failure mode but the diagnosis involves the base, the drainage, or the edge restraint. Those are the cases where surface fixes don’t hold. If your crack pattern shows vertical displacement, if a paver edge is walking outward, if a sunken panel keeps getting worse across wet and dry cycles, or if water is pooling in the driveway, you’re beyond a homeowner-level fix.
We also see cases where the driveway is fine but a bigger project is coming. If you’re planning an addition, an ADU, or any change that might affect the driveway’s grade or drainage, getting the driveway evaluated alongside the other work is smart. Construction Lewisville offers free estimates in Lewisville – call (833) 620-6067. Our technicians have up to 12 years of experience, and we diagnose the failure mode before we quote a repair.
Frequently Asked Questions
Most driveway crack repairs in Lewisville fall into a typical range driven by length, depth, and whether the crack needs epoxy injection or a surface patch. Larger repairs that also address grading or drainage cost more. The written estimate sets the final price, and estimates are free. Call (833) 620-6067 for an exact quote.
Repeated sand loss almost always means either the pavers are moving slightly (so joints open and close to work the sand out), or the joint sand product is below the rated width for a joint that has widened. Check the joint width first. If it’s over the product’s rated maximum, switch to a wide-joint formula like Alliance Gator or Techniseal wide-joint grade. If joints are narrow and sand still disappears, the edge restraint may need attention.
No. We quote from a written, line-item estimate and the price you sign off on is the price. If the diagnosis changes during demolition or excavation (which happens when a hidden base problem is uncovered), we stop, explain what we found, and re-quote before proceeding. No change orders land on you without your approval.
Most parallel cracks can be repaired. The question is whether the slab has stabilized. If vertical displacement between the two sides is under 1/8 inch and the crack isn’t growing across wet-dry cycles, patching with the correct product works. If displacement exceeds 1/4 inch or the crack keeps widening, the base has failed and a rebuild is the honest answer.
Most cities require a permit for driveway replacement and for work that changes the grade or affects drainage. Repairs to existing concrete and re-sanding pavers typically don’t require permits. We confirm what your city’s building department needs before work begins, and we pull permits and pass inspections where required.
Crack repair on a typical Lewisville driveway usually takes a single working day. A partial rebuild or paver edge restraint repair takes two to four days depending on the weather and the cure time for the products used. Full driveway replacement usually runs one to two weeks between demolition, base prep, pouring or installing, and cure time. The written estimate includes the timeline.
The Bottom Line
Every driveway problem in Lewisville traces back to one of four causes, and knowing which one you have is what makes the repair last. Read the crack geometry before you call anyone. Check whether the failure is surface, base, or drainage. Measure the joint gaps before you buy polymeric sand. And know the numbers that mark the line between repair and replacement: 1/4 inch for vertical displacement, 1/2 inch for crack width, 30% for surface area. Repair what’s repairable. Rebuild what isn’t. Our technicians have up to 12 years of experience reading these patterns, and we’d rather give you an honest answer than a repair that fails in a season. Call (833) 620-6067 to schedule your free estimate. We answer 24/7. Fast dispatch, 7am-7pm, Sunday through Friday.
Written by the team at Construction Lewisville.